
Support / Integrations
Unlock seamless integration with your favorite CRM.
Effortlessly integrate with leading CRMs - HubSpot, Outreach, and Salesforce. Click below to get started with our comprehensive integration guides.



Setup guides
Connect your CRM, step by step.
Each guide assumes you're signed in to Tendril Connect with the credentials emailed to you, and that your CRM admin account uses the same email address as your Tendril Connect account.
For a Super Admin HubSpot account.
-
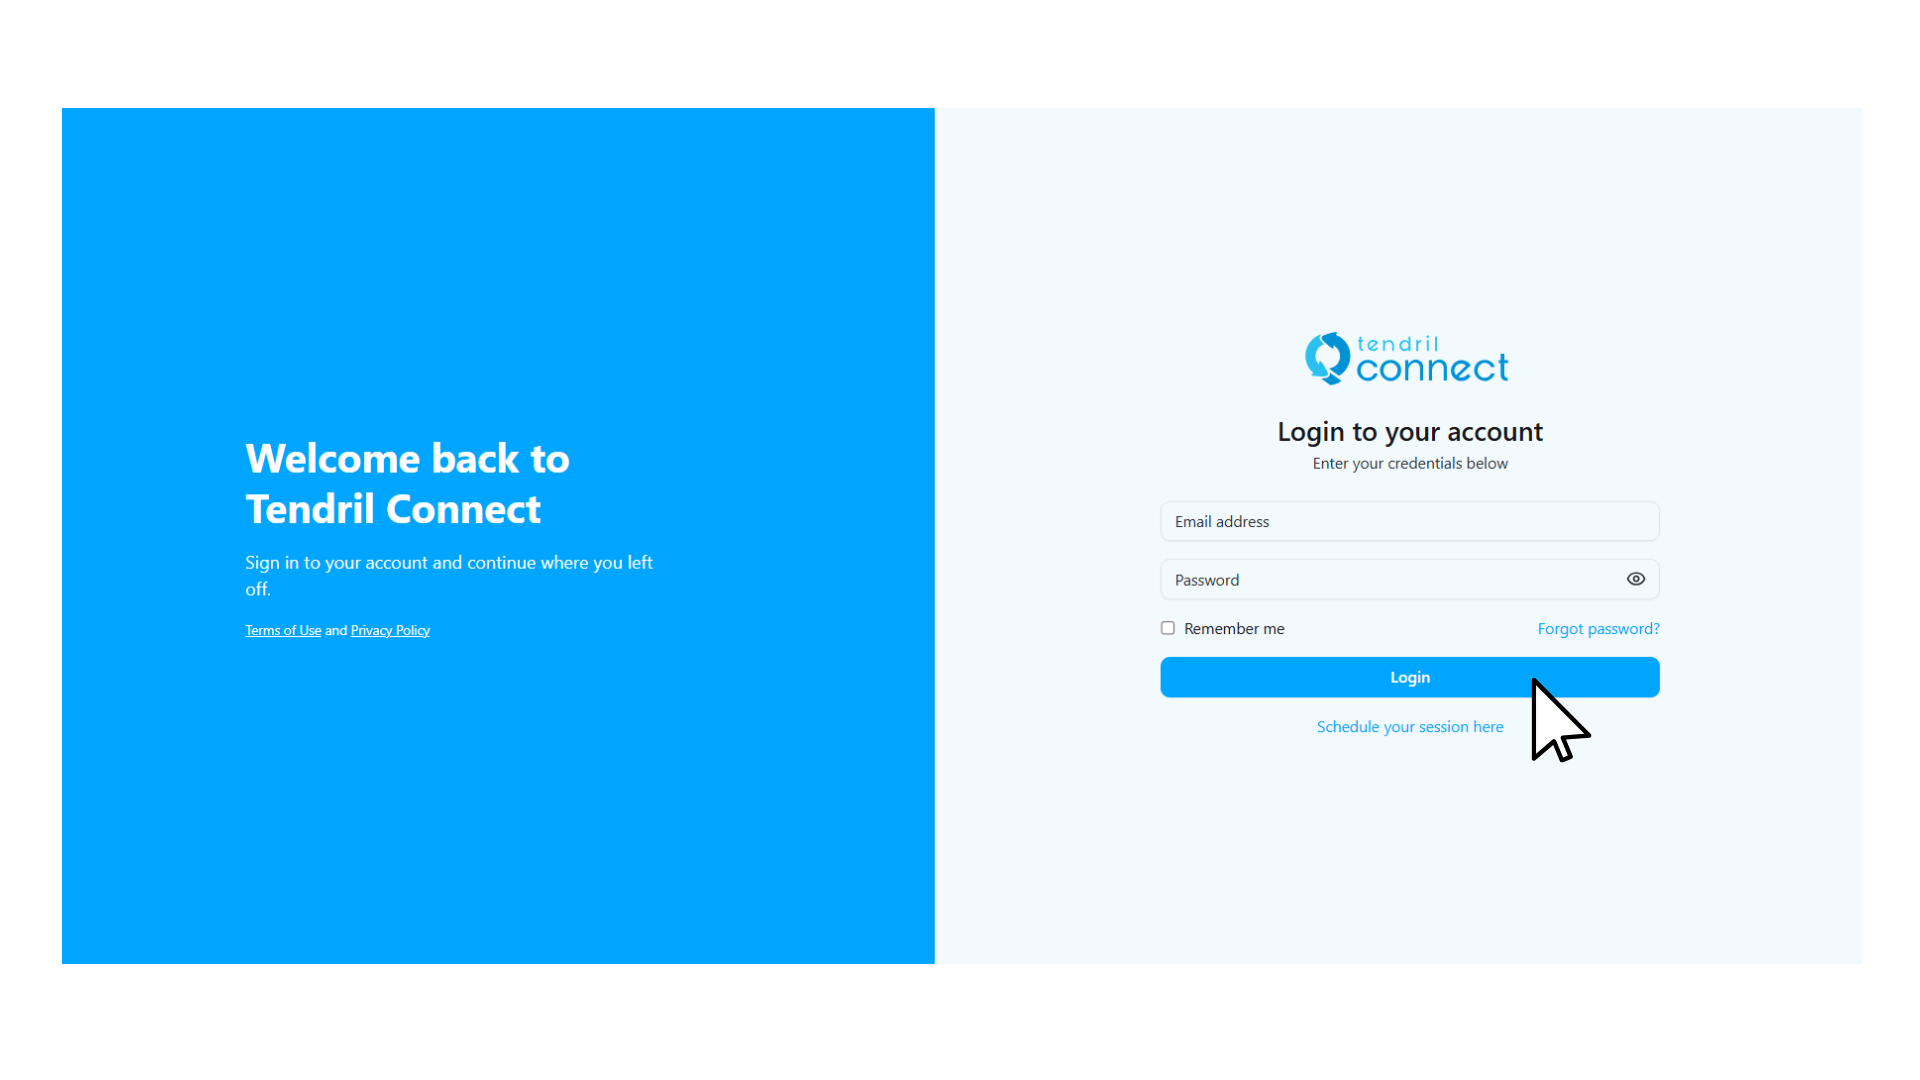
Log in to Tendril Connect using the credentials sent to your email.
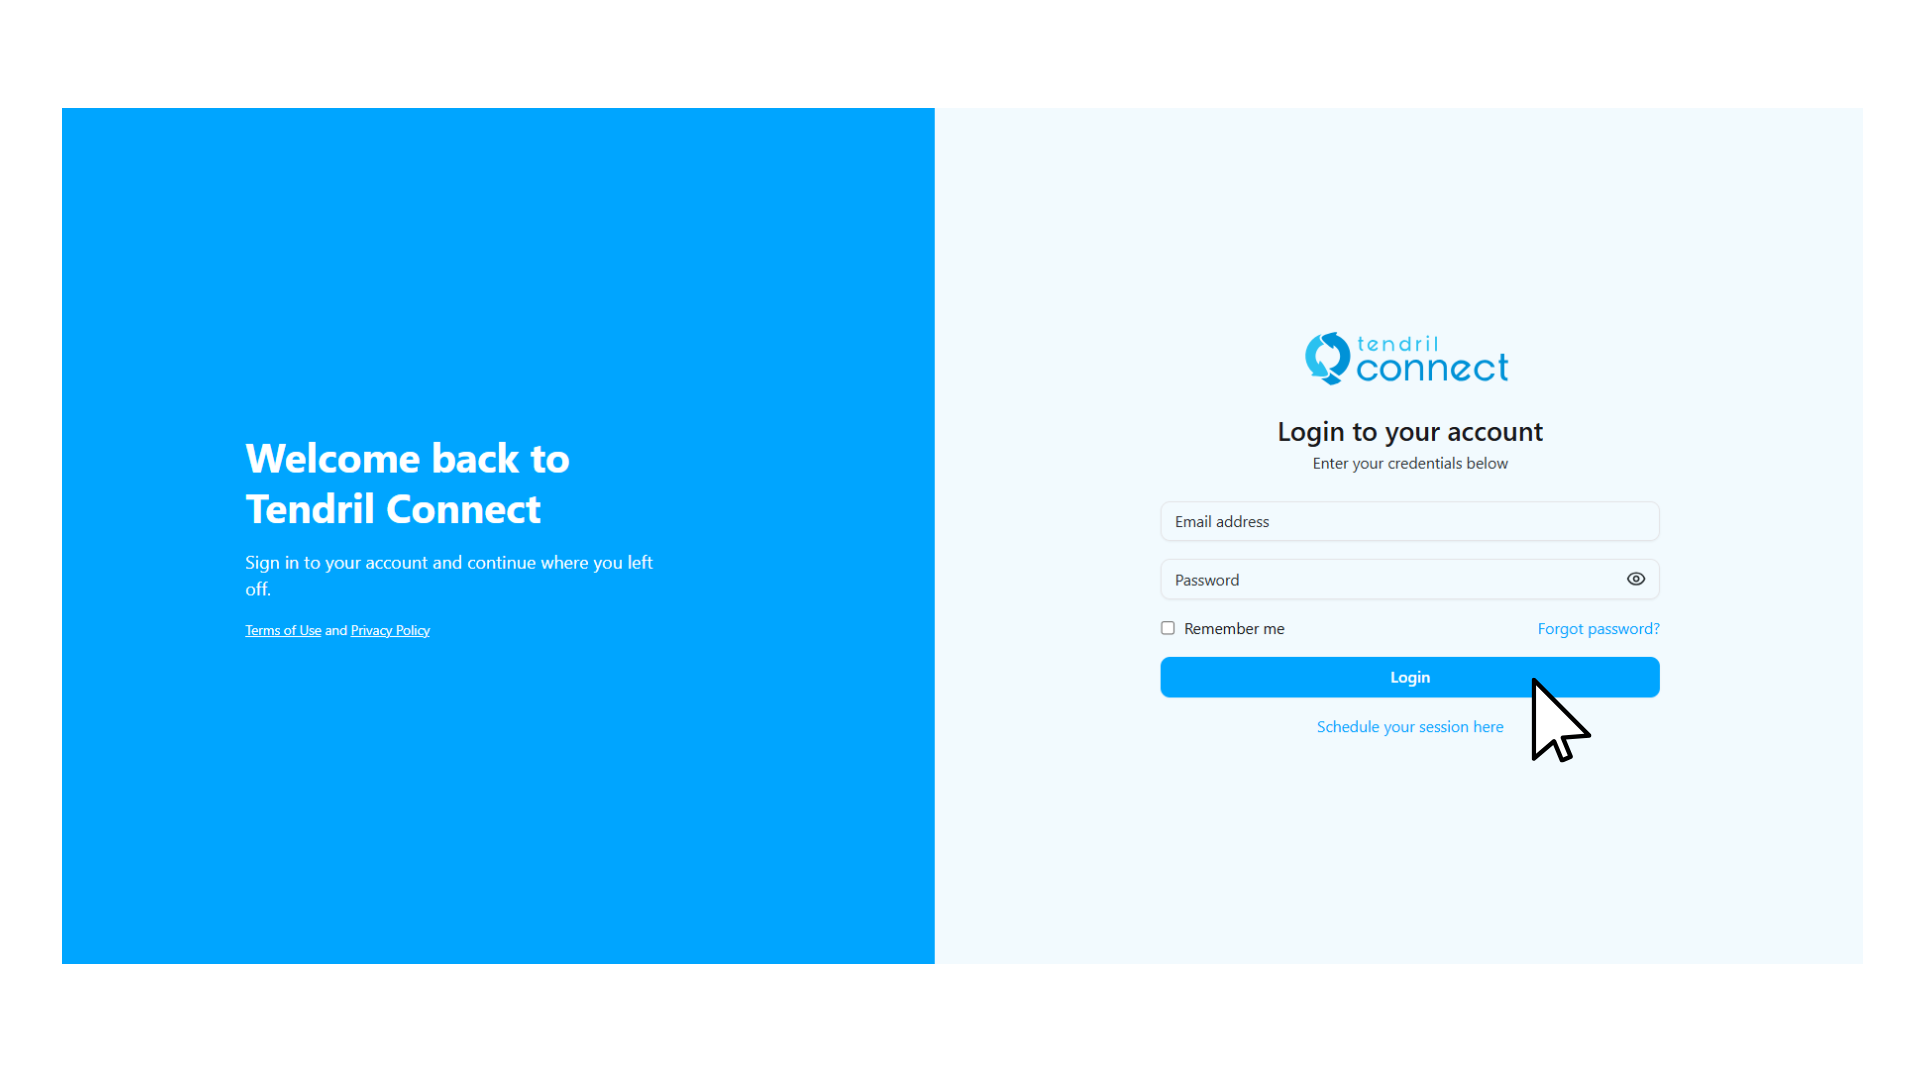
-
Go to Settings on the left menu.
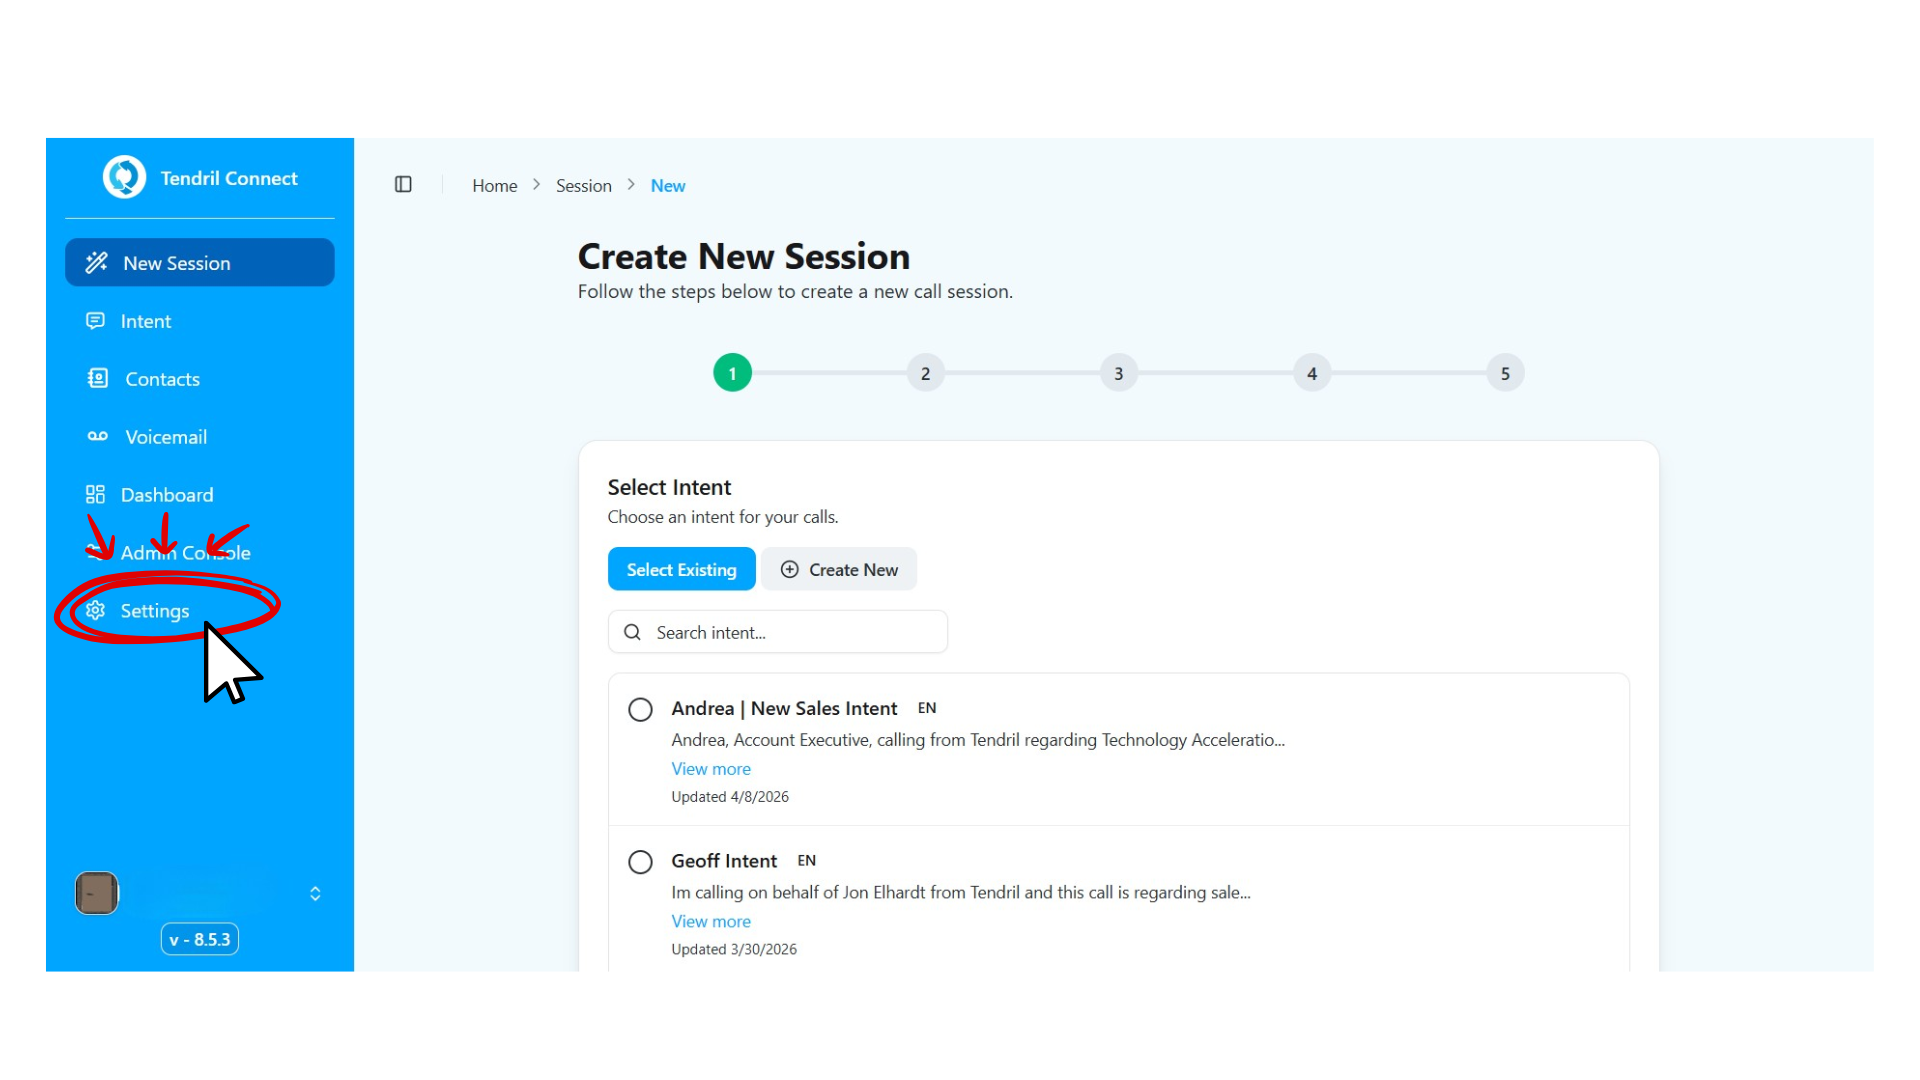
-
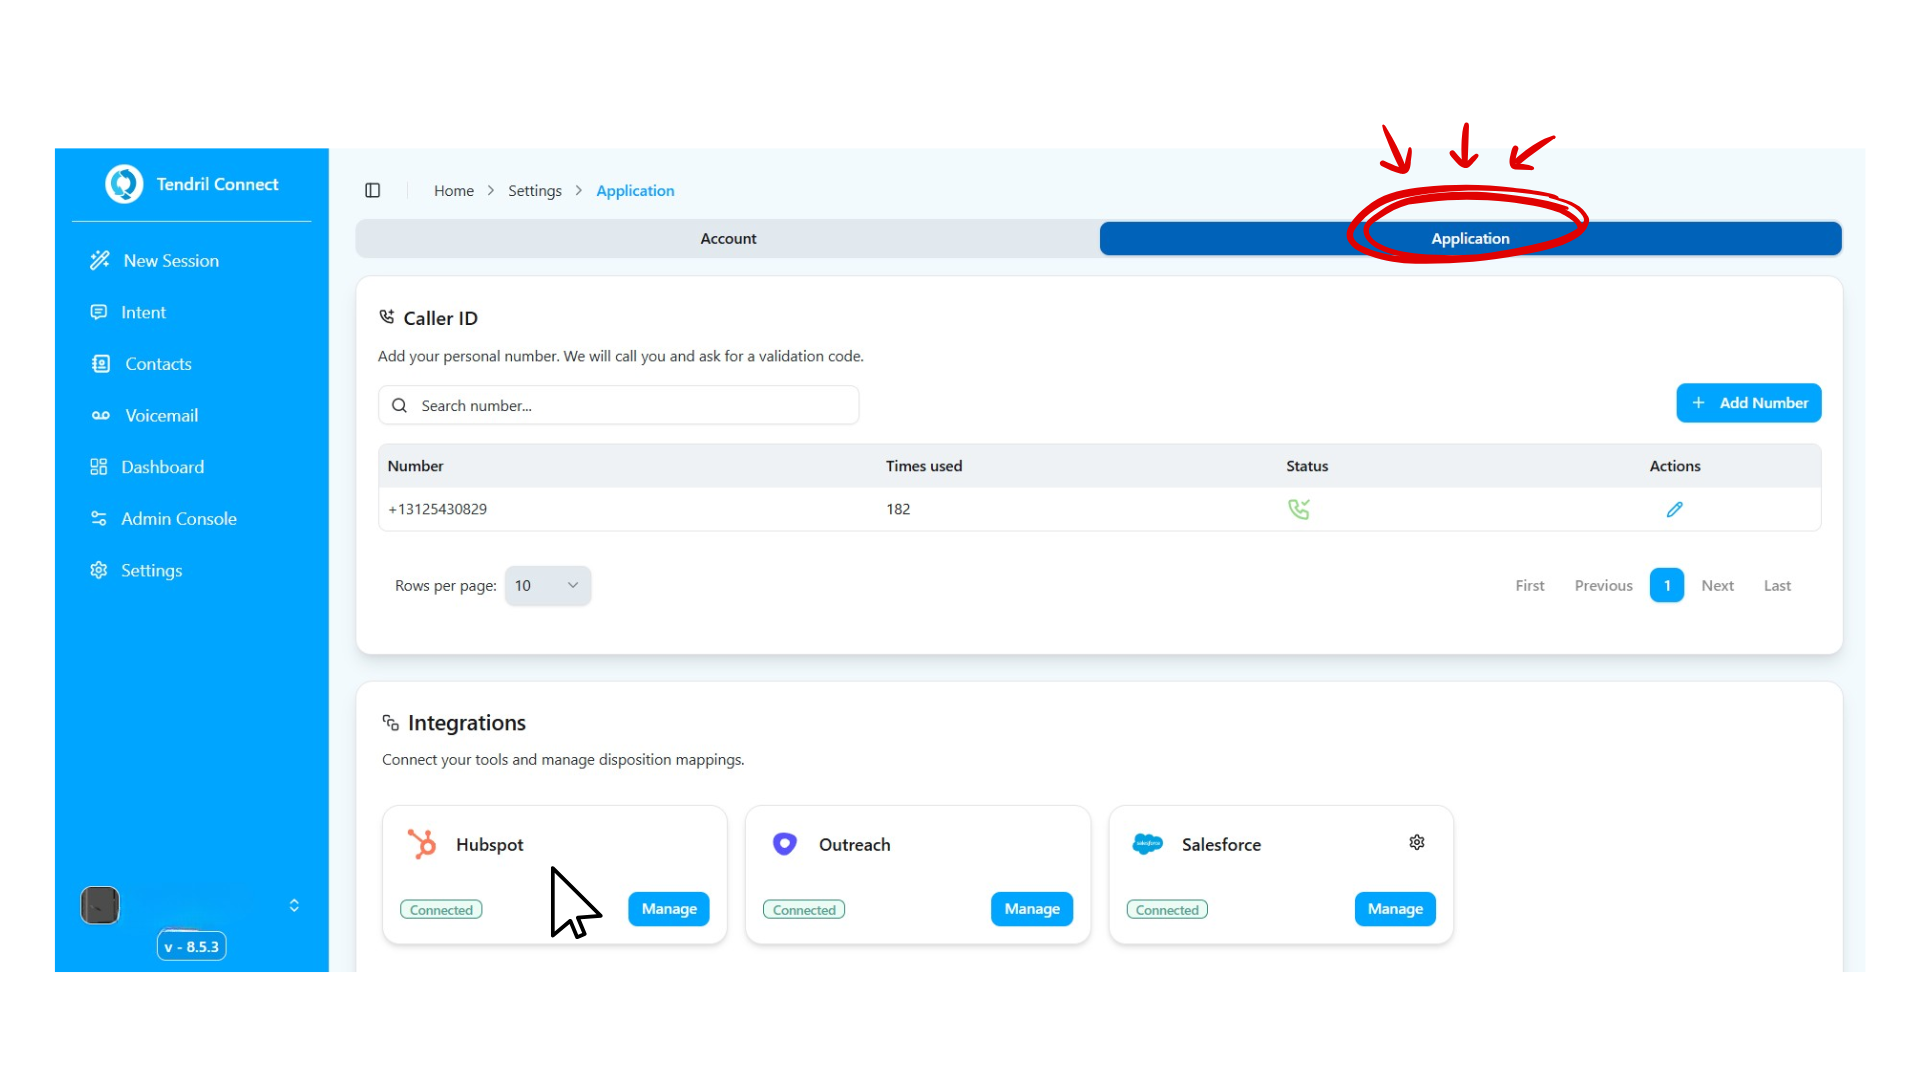
Integrate HubSpot inside Tendril- select "Application" on the top bar, select the HubSpot tab, then Add / Manage your HubSpot account.
- Sign in to your HubSpot account from the prompt.
-
Sync your Tendril account- choose Tendril as the account to sync. You'll then see all your HubSpot users inside Tendril Connect.
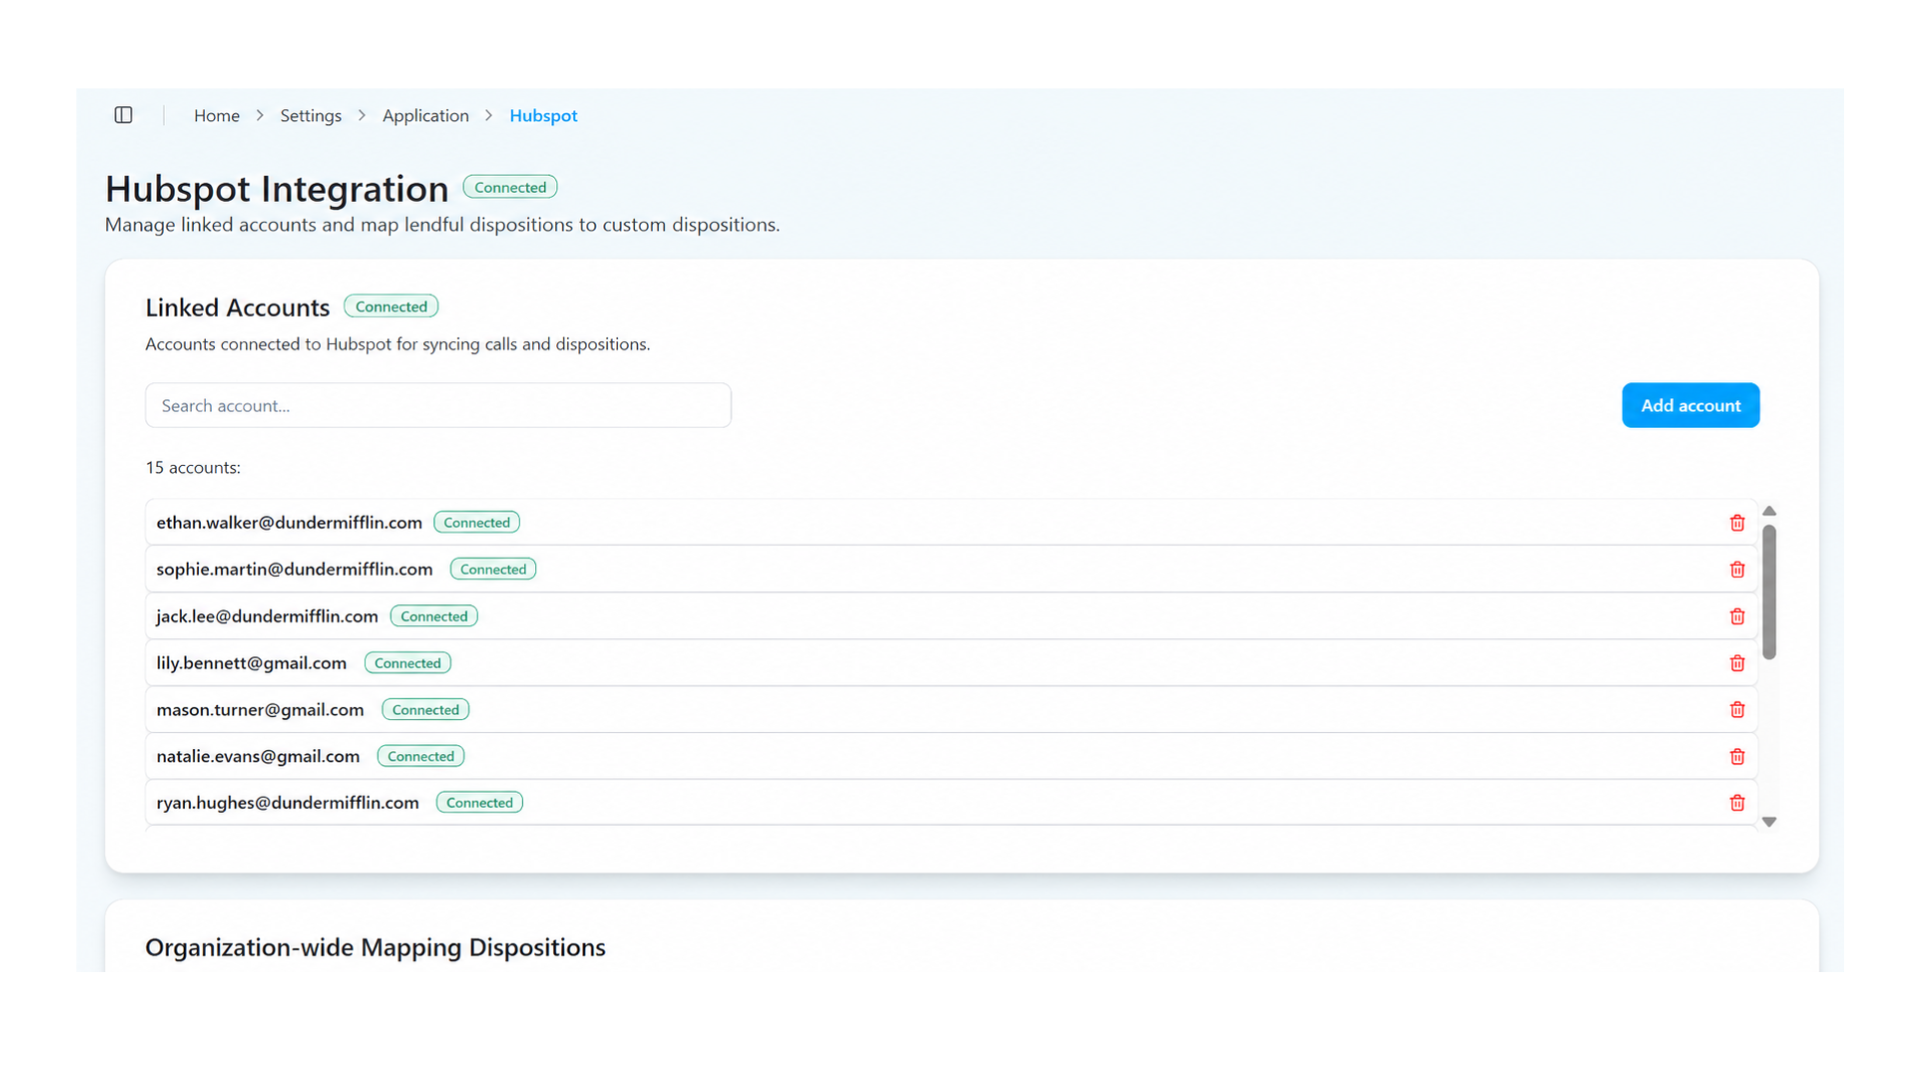
If the connection section doesn't appear, go back to Tendril and do a hard refresh (Mac: ⌘ + ⇧ + R, Windows: Ctrl + ⇧ + R), then click the HubSpot logo again.
For a Salesforce Admin user account. Our platform updates weekly - hard-refresh (Mac: ⌘ + ⇧ + R, Windows: Ctrl + ⇧ + R) whenever a new version is available.
1. Get your callback URL from Tendril Connect
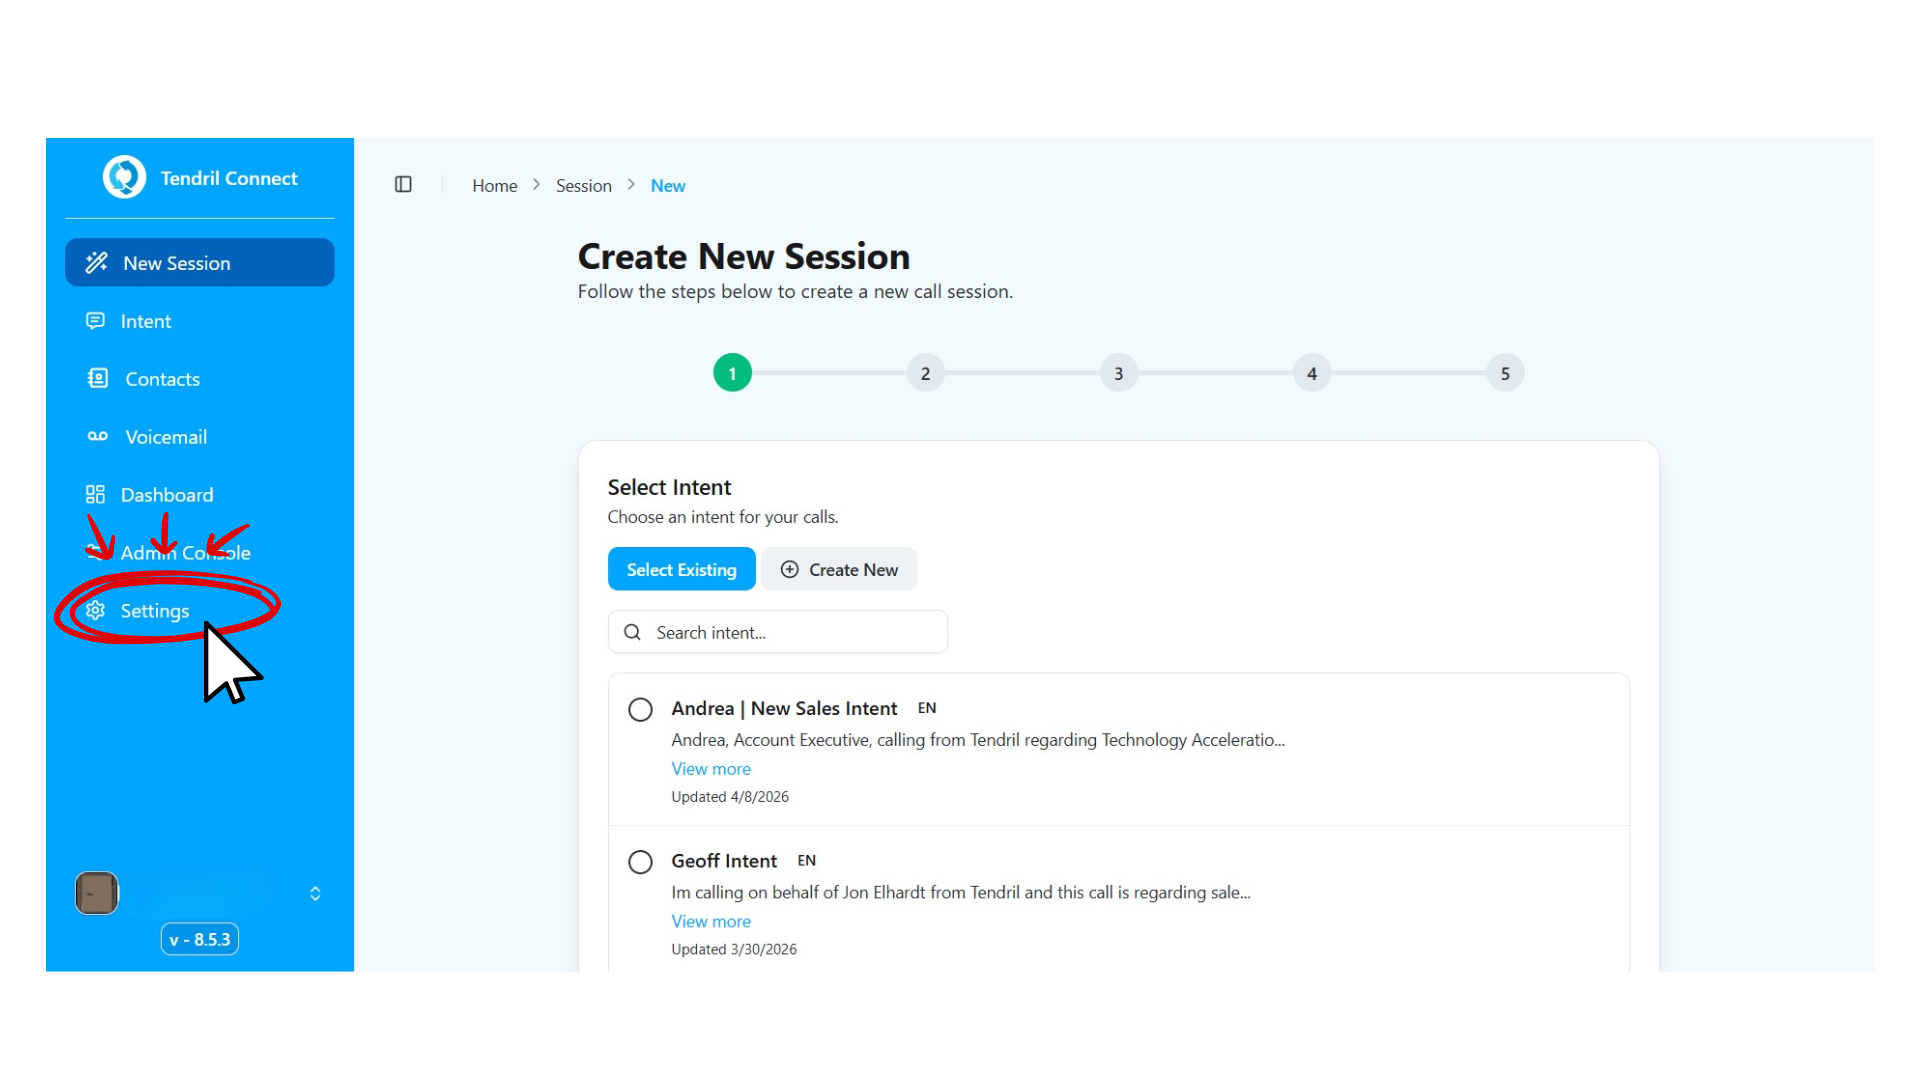
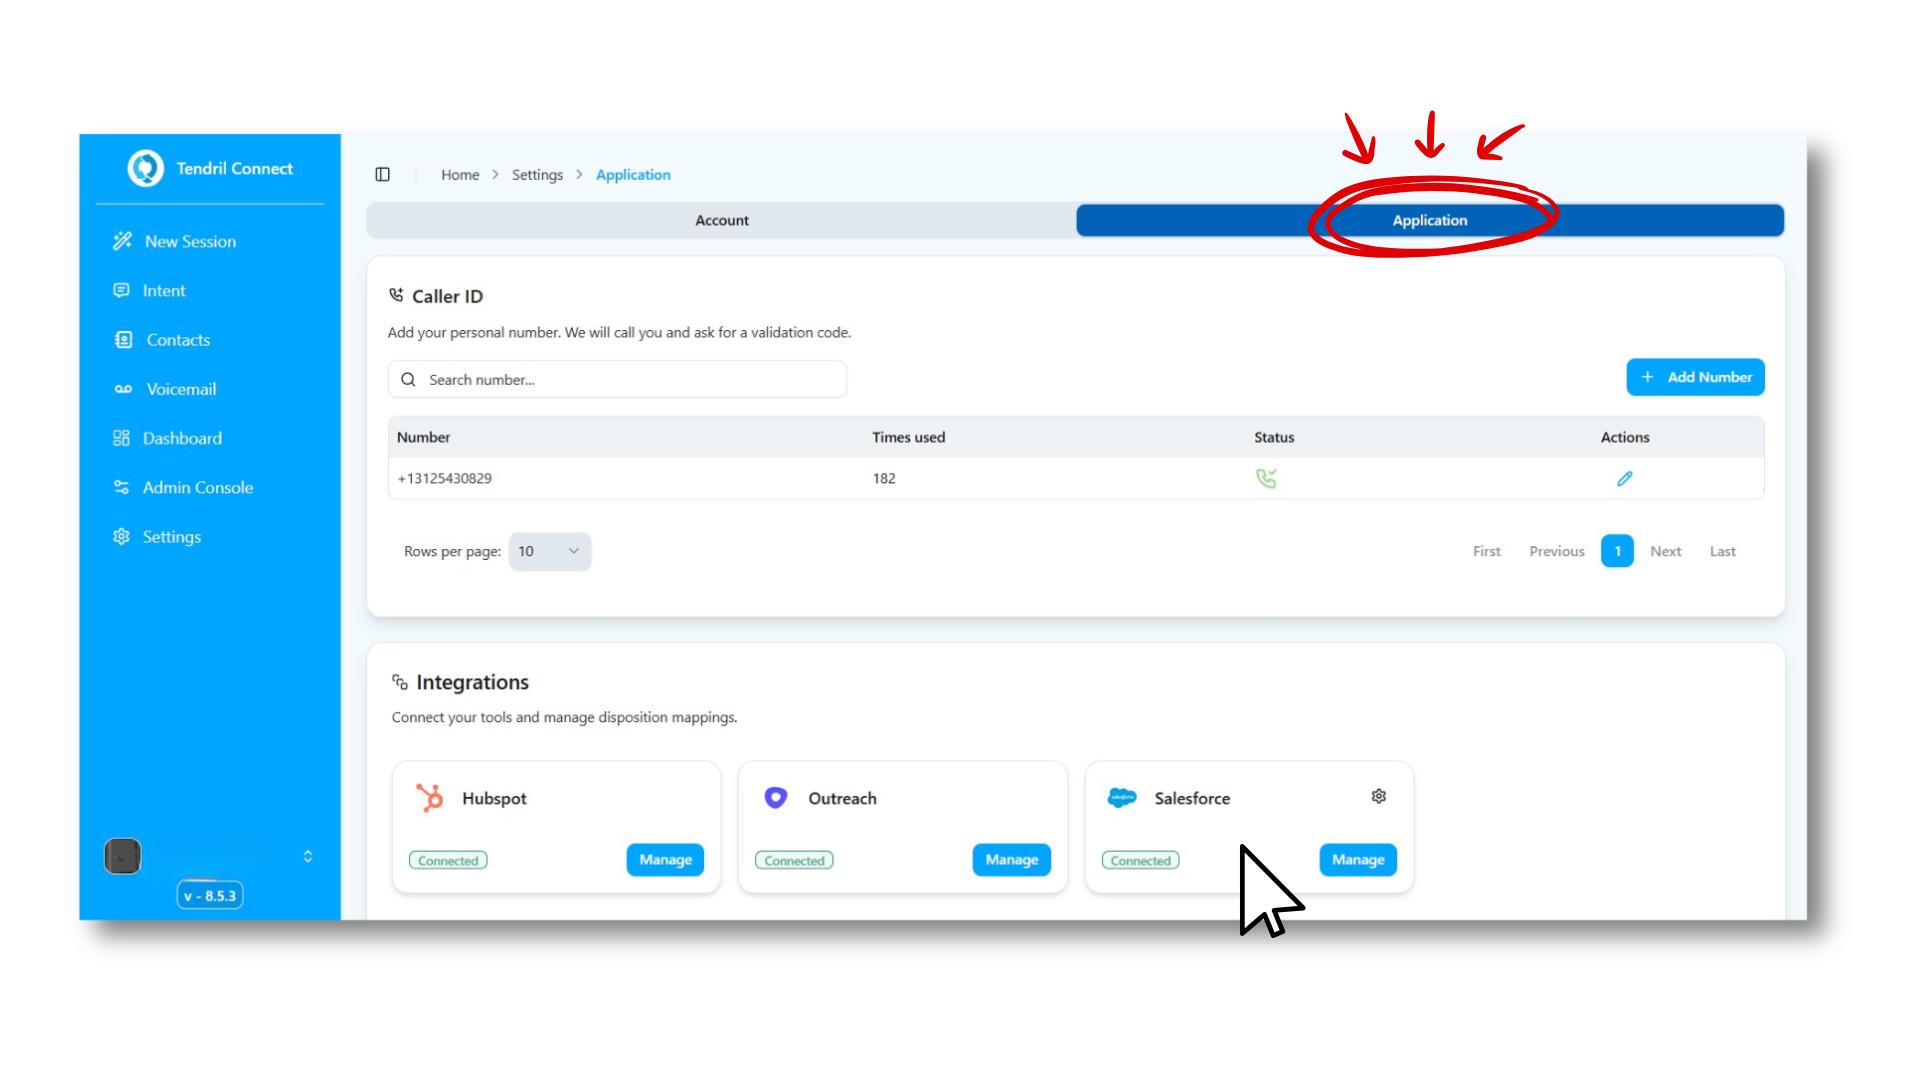
Log in to Tendril Connect using the credentials sent to your email, then go to Settings → Application → Salesforce tab → Add / Manage your Salesforce Account. Copy the Redirect URL (OAuth) that's automatically filled in - you'll paste it into Salesforce next.
2. Create a Tendril app in Salesforce
Sign in to Salesforce using the exact same email as your Tendril Connect account. Go to Setup → Setup submenu, Quick Find "App Manager", and create a new External Client App with:
- External Client App name: Tendril Connect
- API Name: auto-populated from the app name
- Contact Email: contact@tendril.us
- Distribution State: Local
- Contact Phone: +1 866 740 4470
- Info URL: tendril.us/support/integrations/salesforce
Check Enable OAuth Settings and paste in the callback URL you copied from Tendril. Leave every option in Flow Enablement unchecked, and under Security check only Require secret for Refresh Token Flow.
3. Configure the Salesforce app values inside Tendril Connect
Back in Tendril, select these OAuth scopes:
- Access the identity URL service (id, profile, email, address, phone)
- Manage user data via APIs (api)
- Full access (full)
- Access Connect REST API resources (chatter_api)
- Perform requests at any time (refresh_token, offline_access)
- Access custom permissions (custom_permissions)
- Access Lightning applications (lightning)
- Access content resources (content)
- Access the Salesforce API Platform (sfap_api)
- Access Interaction API resources (interaction_api)
Leave Introspect All Tokens and Configure ID token unchecked. Copy the exact External Client App name from Salesforce's basic information into Tendril, then select New External Client App.
4. Sync your Salesforce admin user with SSO
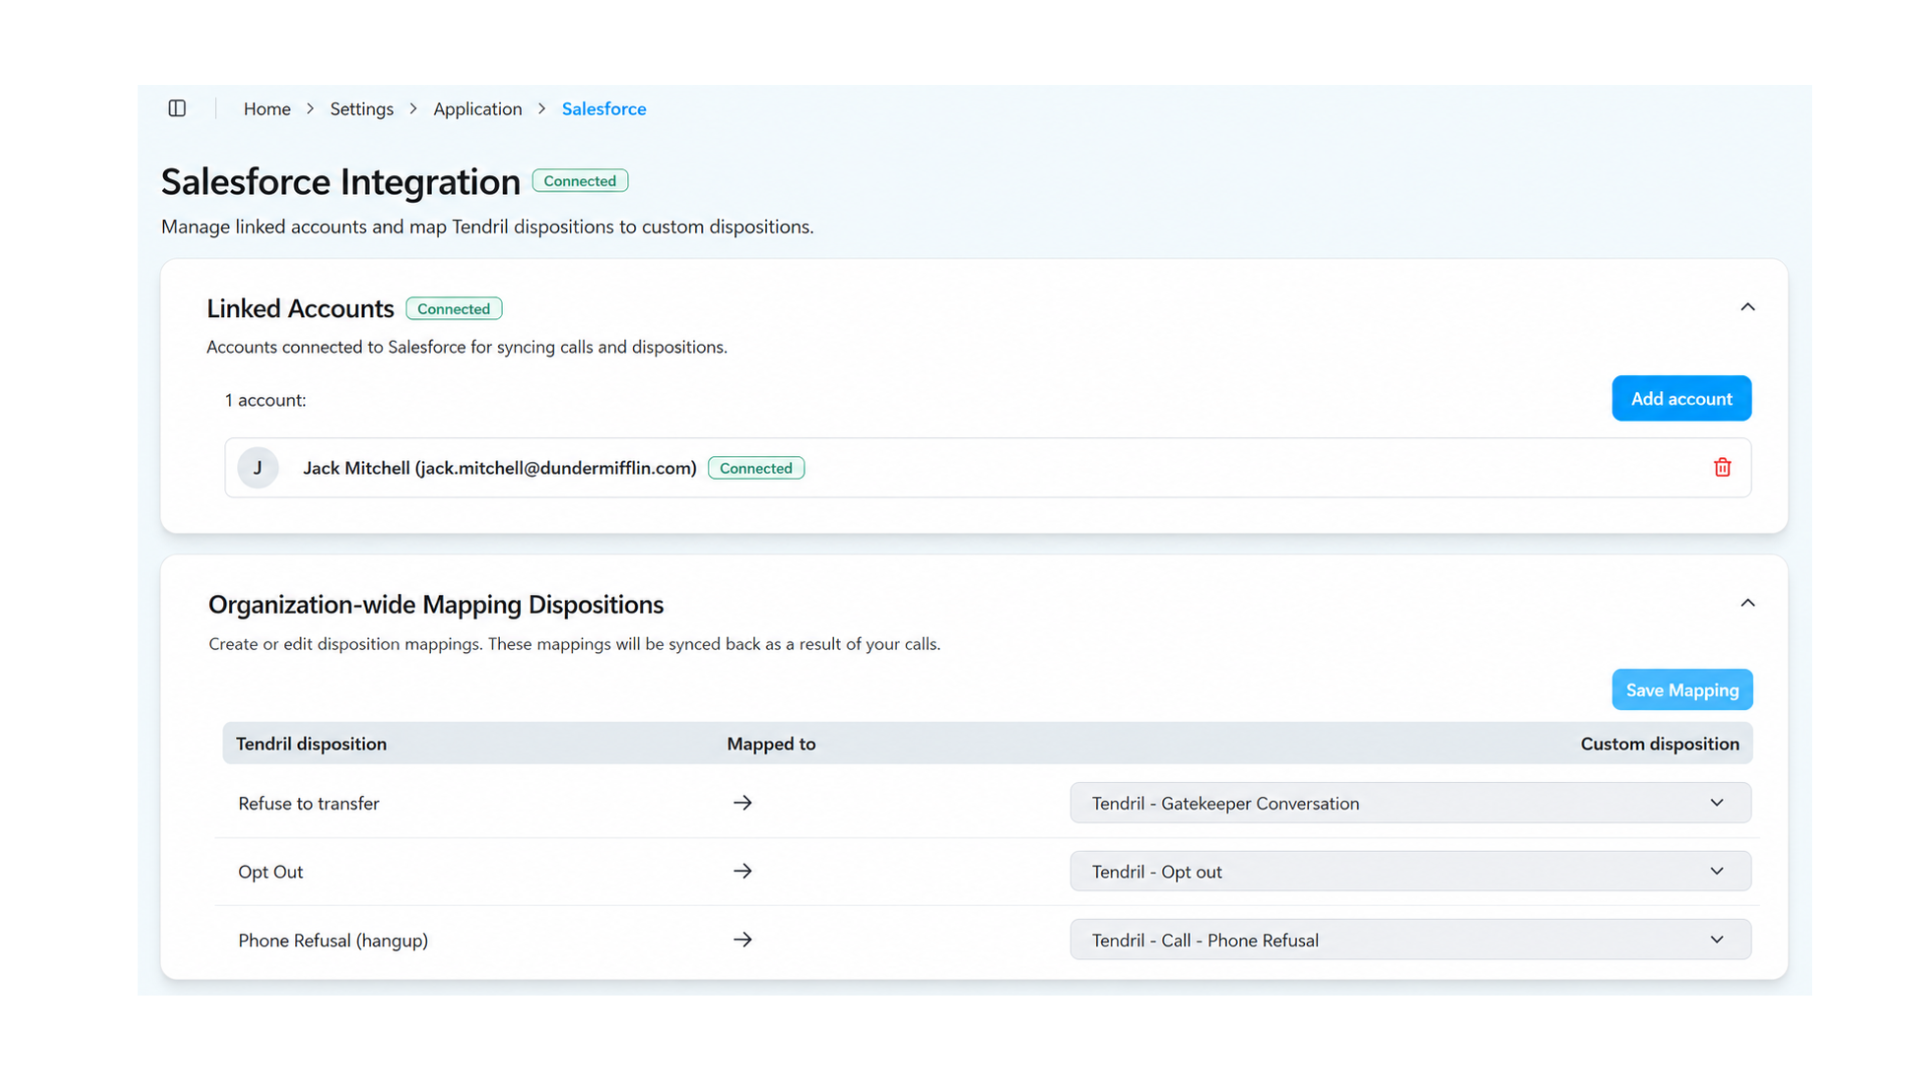
In Tendril, go to Settings → Integrations → Salesforce and click the Salesforce logo. Log in with the same email used on your Tendril Connect account to confirm the accounts are synced - you'll see your Salesforce users appear inside Tendril.
5. Create a dial report in Salesforce
We support Account & Contact Reports and Lead Reports. From Salesforce, click Reports → New Report, choose Accounts & Contacts (or Leads), and make sure these columns are included:
Accounts & Contacts
Contact ID*, First name*, Last name*, Phone number 1*
Leads
Lead ID*, First name*, Last name*, Phone number 1*
Adjust the Filters tab as needed, click Save, and give the report a name you can find easily - it will appear in Tendril Connect under your Salesforce contact lists.
6. Verify the sync
In the Contacts Panel, select the Salesforce tab and choose a list to confirm it synced successfully. Once your Tendril Connect session ends, click End Session to start the sync back to Salesforce - build a completed-tasks report in Salesforce to verify.
Our integration doesn't currently support custom task fields with validation - remove all validations from standard and non-standard fields, and add the following values to your call-result pick list (Tendril Disposition): Refuse to transfer, Opt out, Phone Refusal (Hang up), Left Voicemail, Gatekeeper Conversation, Referred to another contact, No longer with company, Set appointment, Wrong number, Phone tree no connection, No answer, Decision maker conversation, Other, Bad number / Busy signal, User did not pick up.
Consumer Key and Secret are under Settings → Basic Information → Open OAuth Settings.
For a Super Admin Outreach account.
-
Log in to Tendril Connect using the credentials sent to your email.
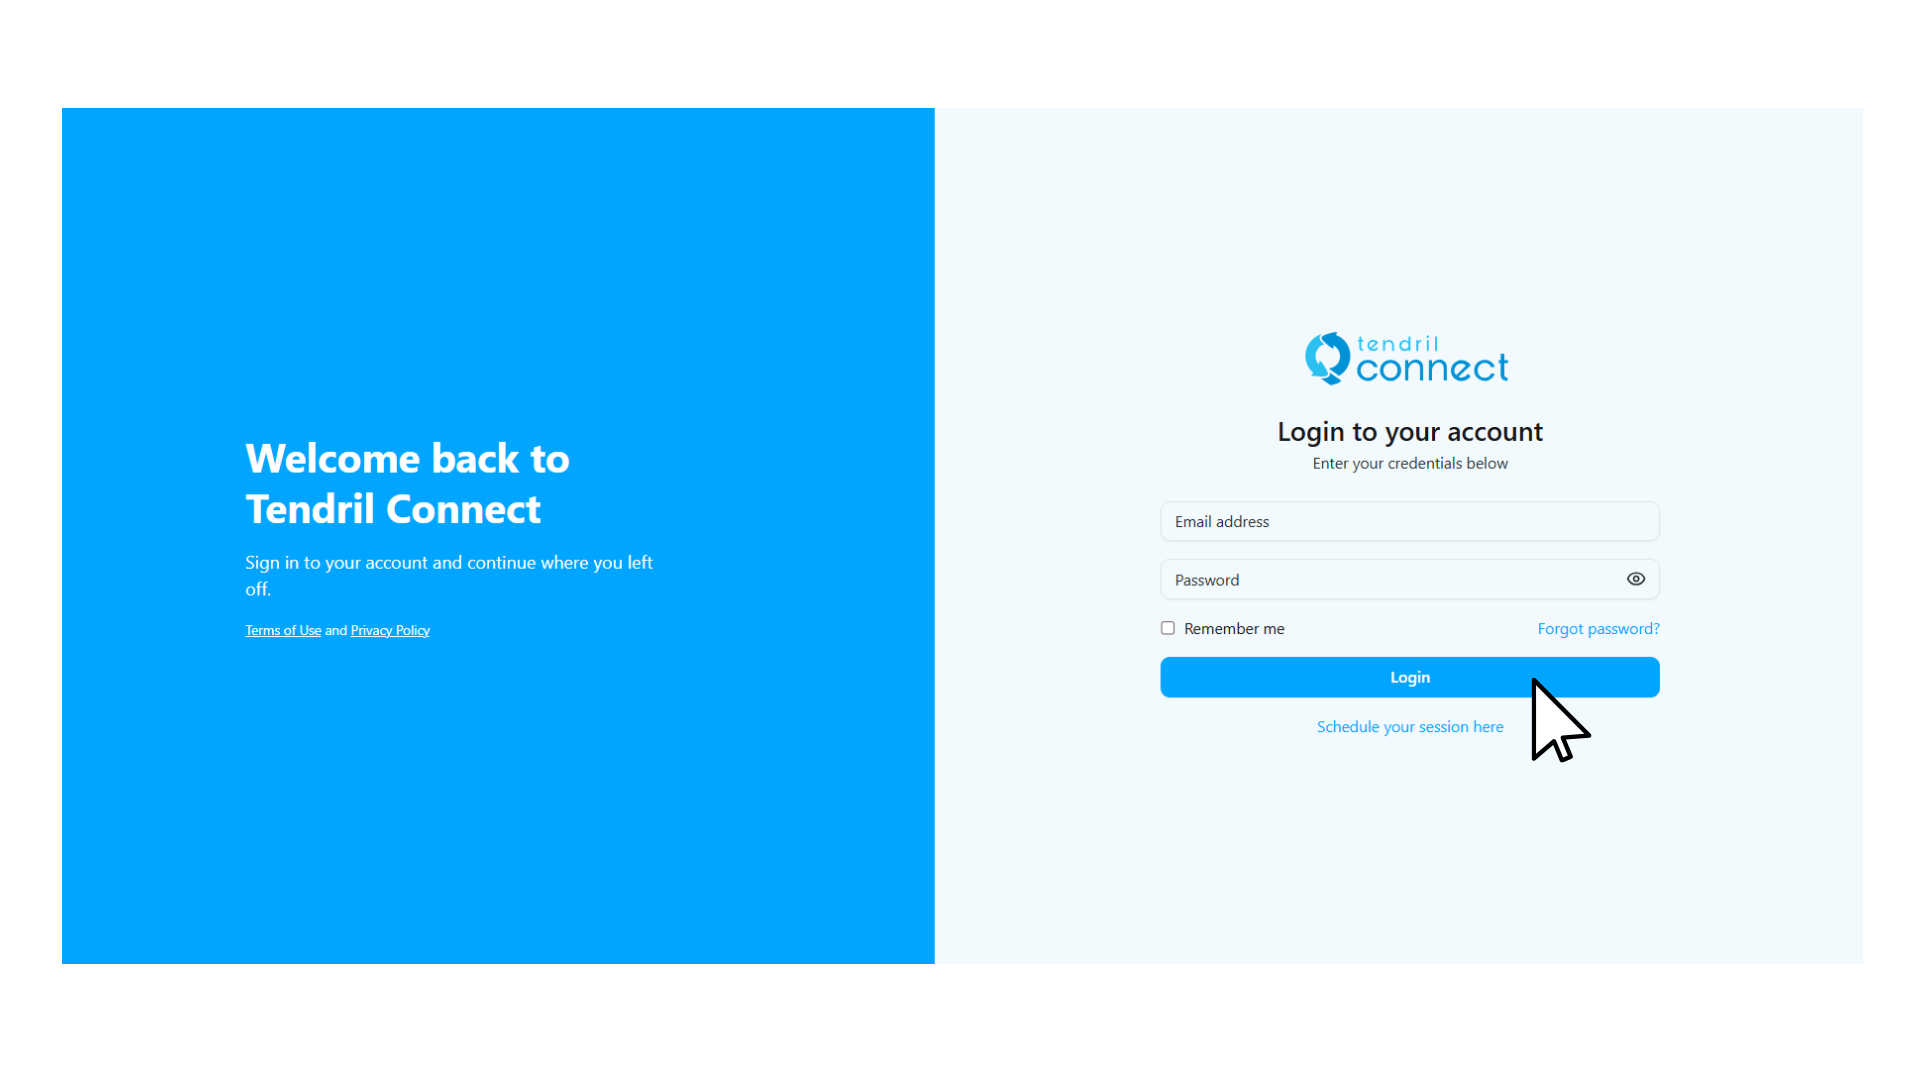
-
Go to Settings on the left menu.
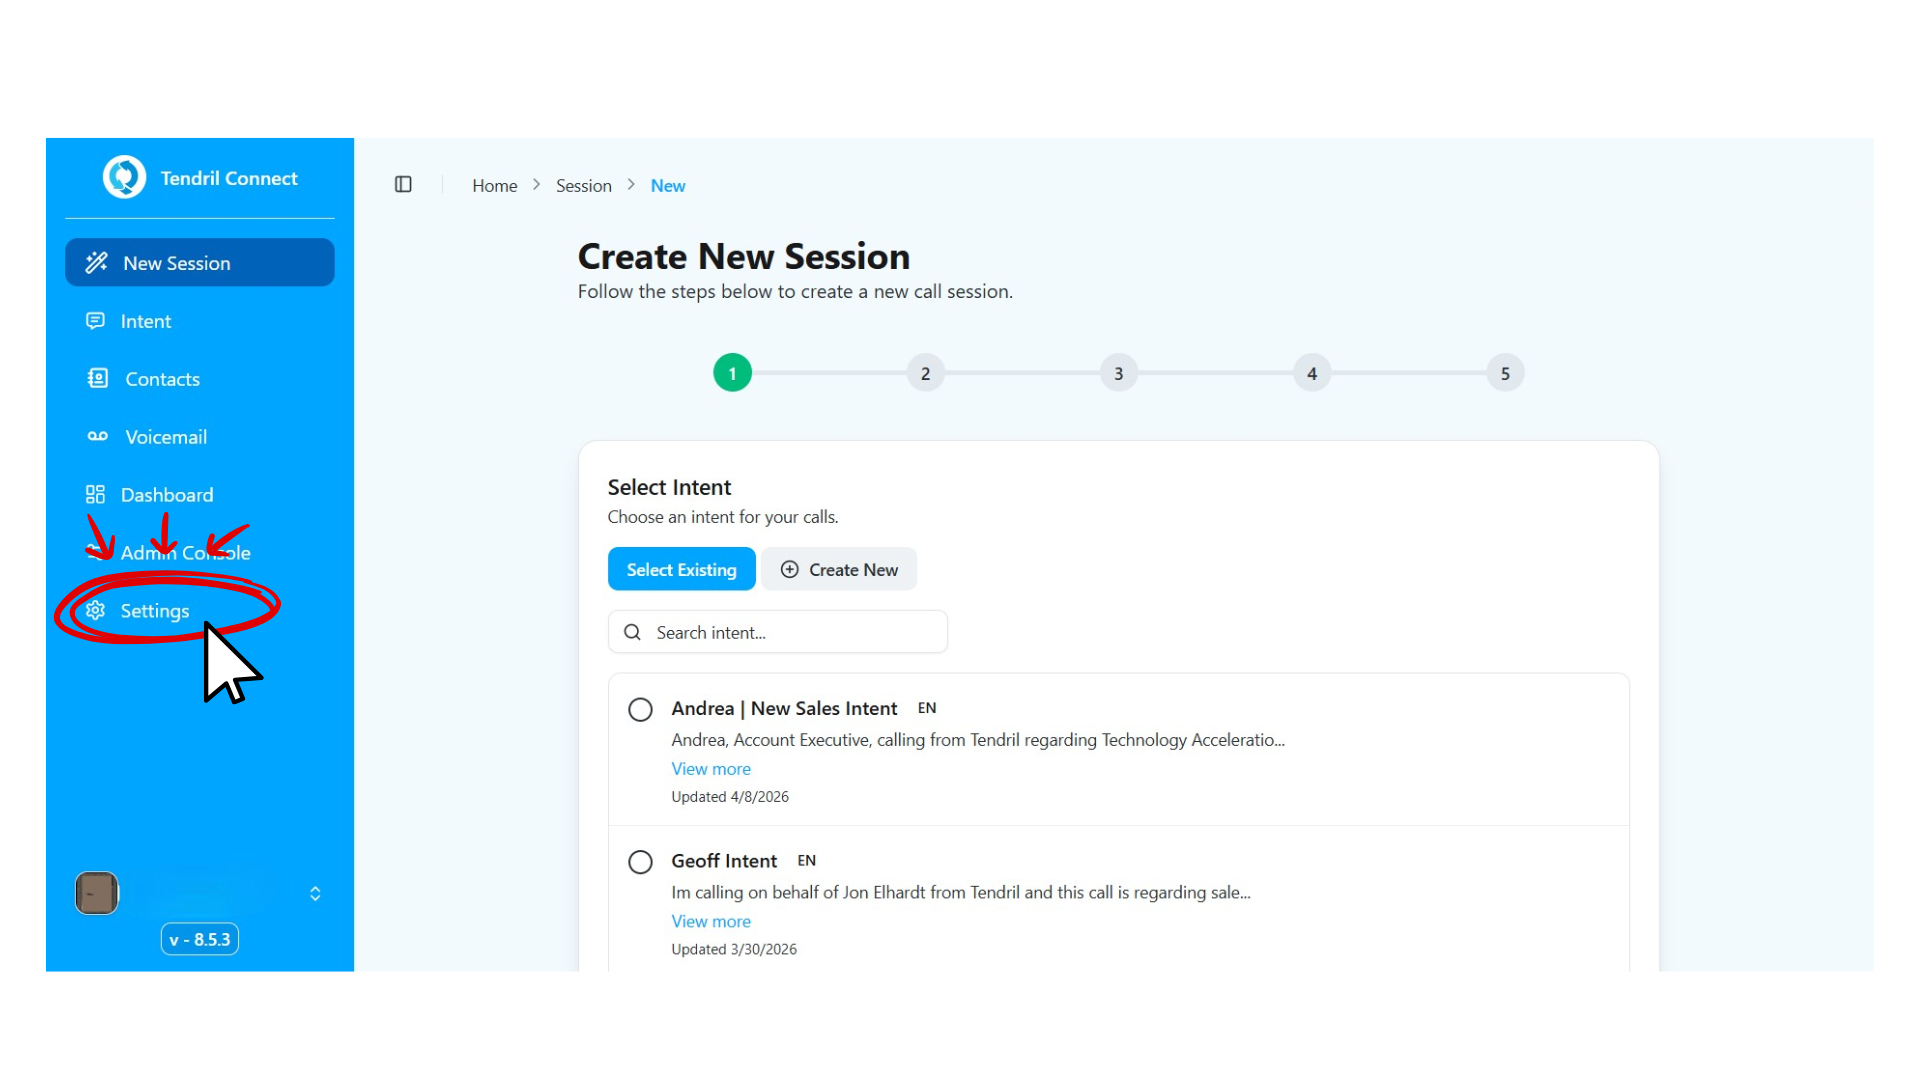
-
Integrate Outreach inside Tendril- select "Application" on the top bar, select the Outreach tab, then Add / Manage your Outreach account.
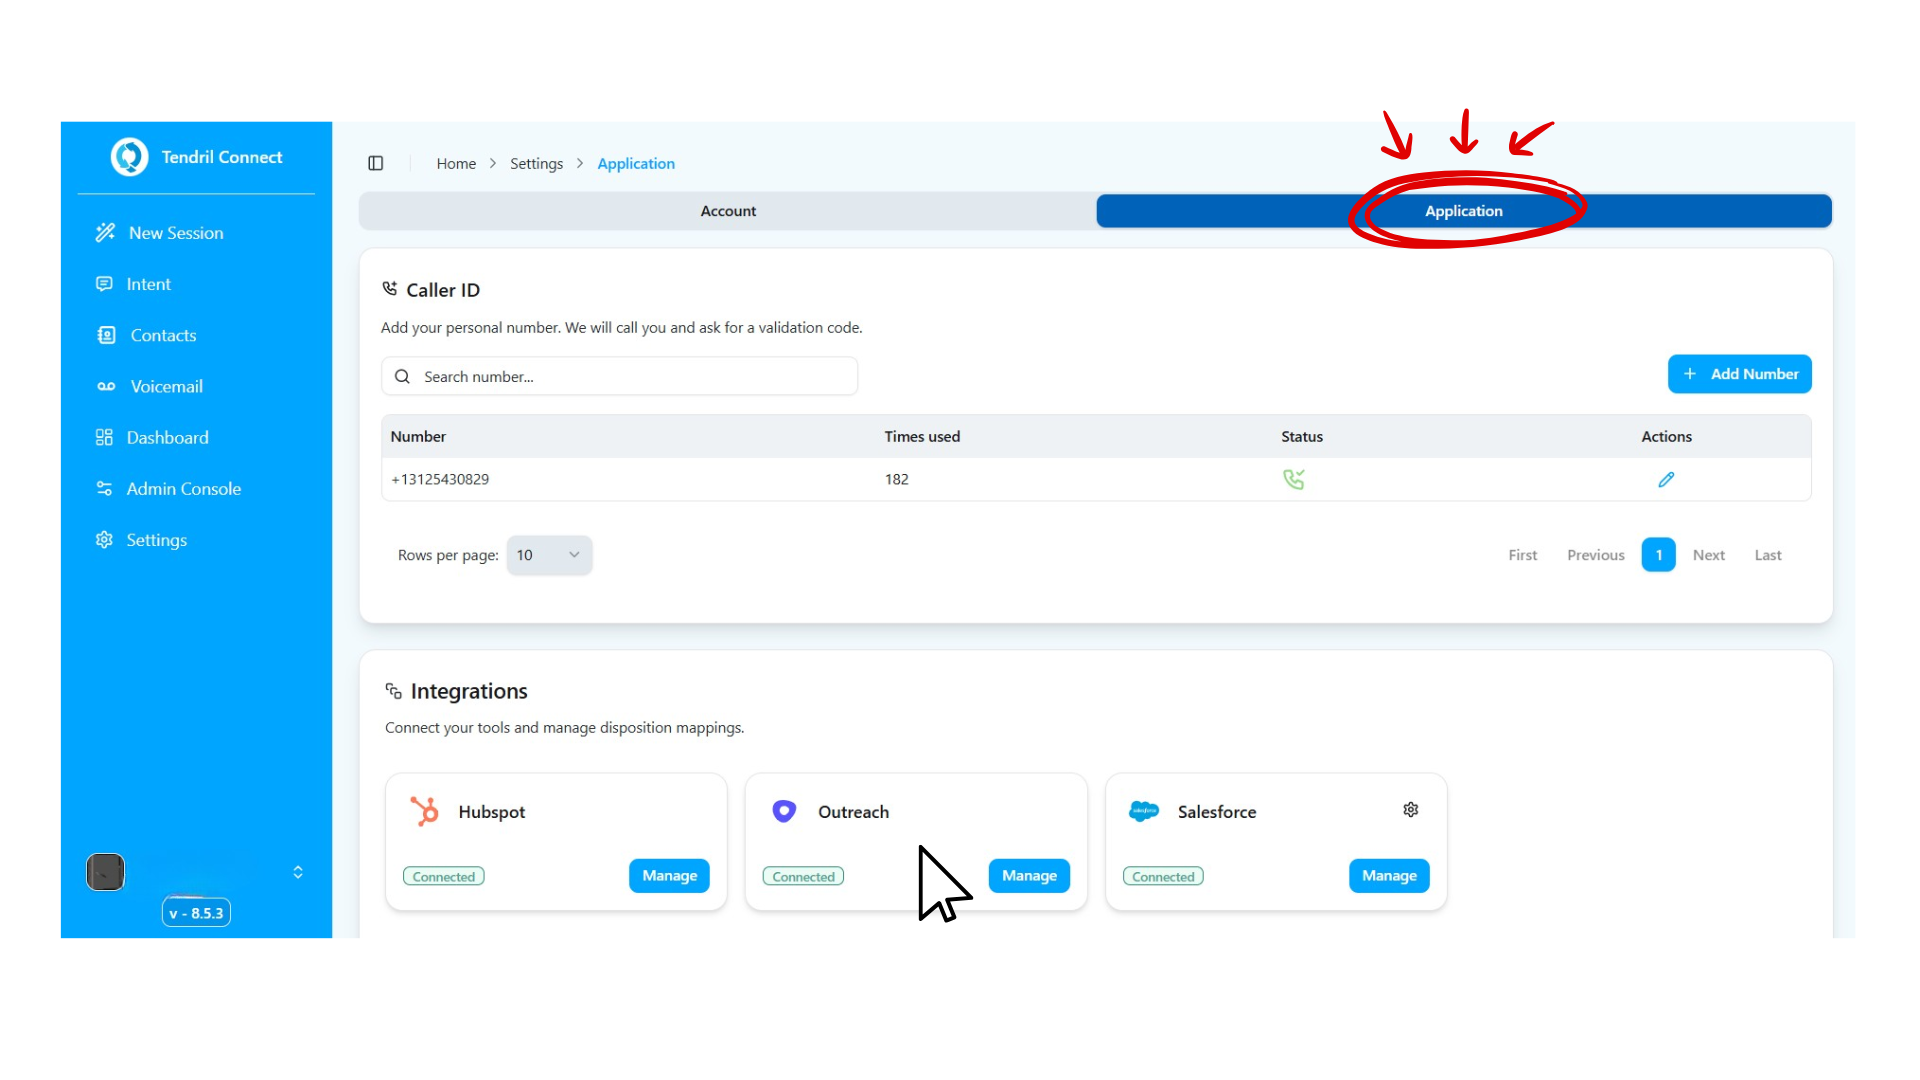
- Sign in to your Outreach account- the admin email needs to match your Tendril account exactly.
-
Confirm the sync- go to Dashboard → Integrations → Outreach and verify your contact list appears.
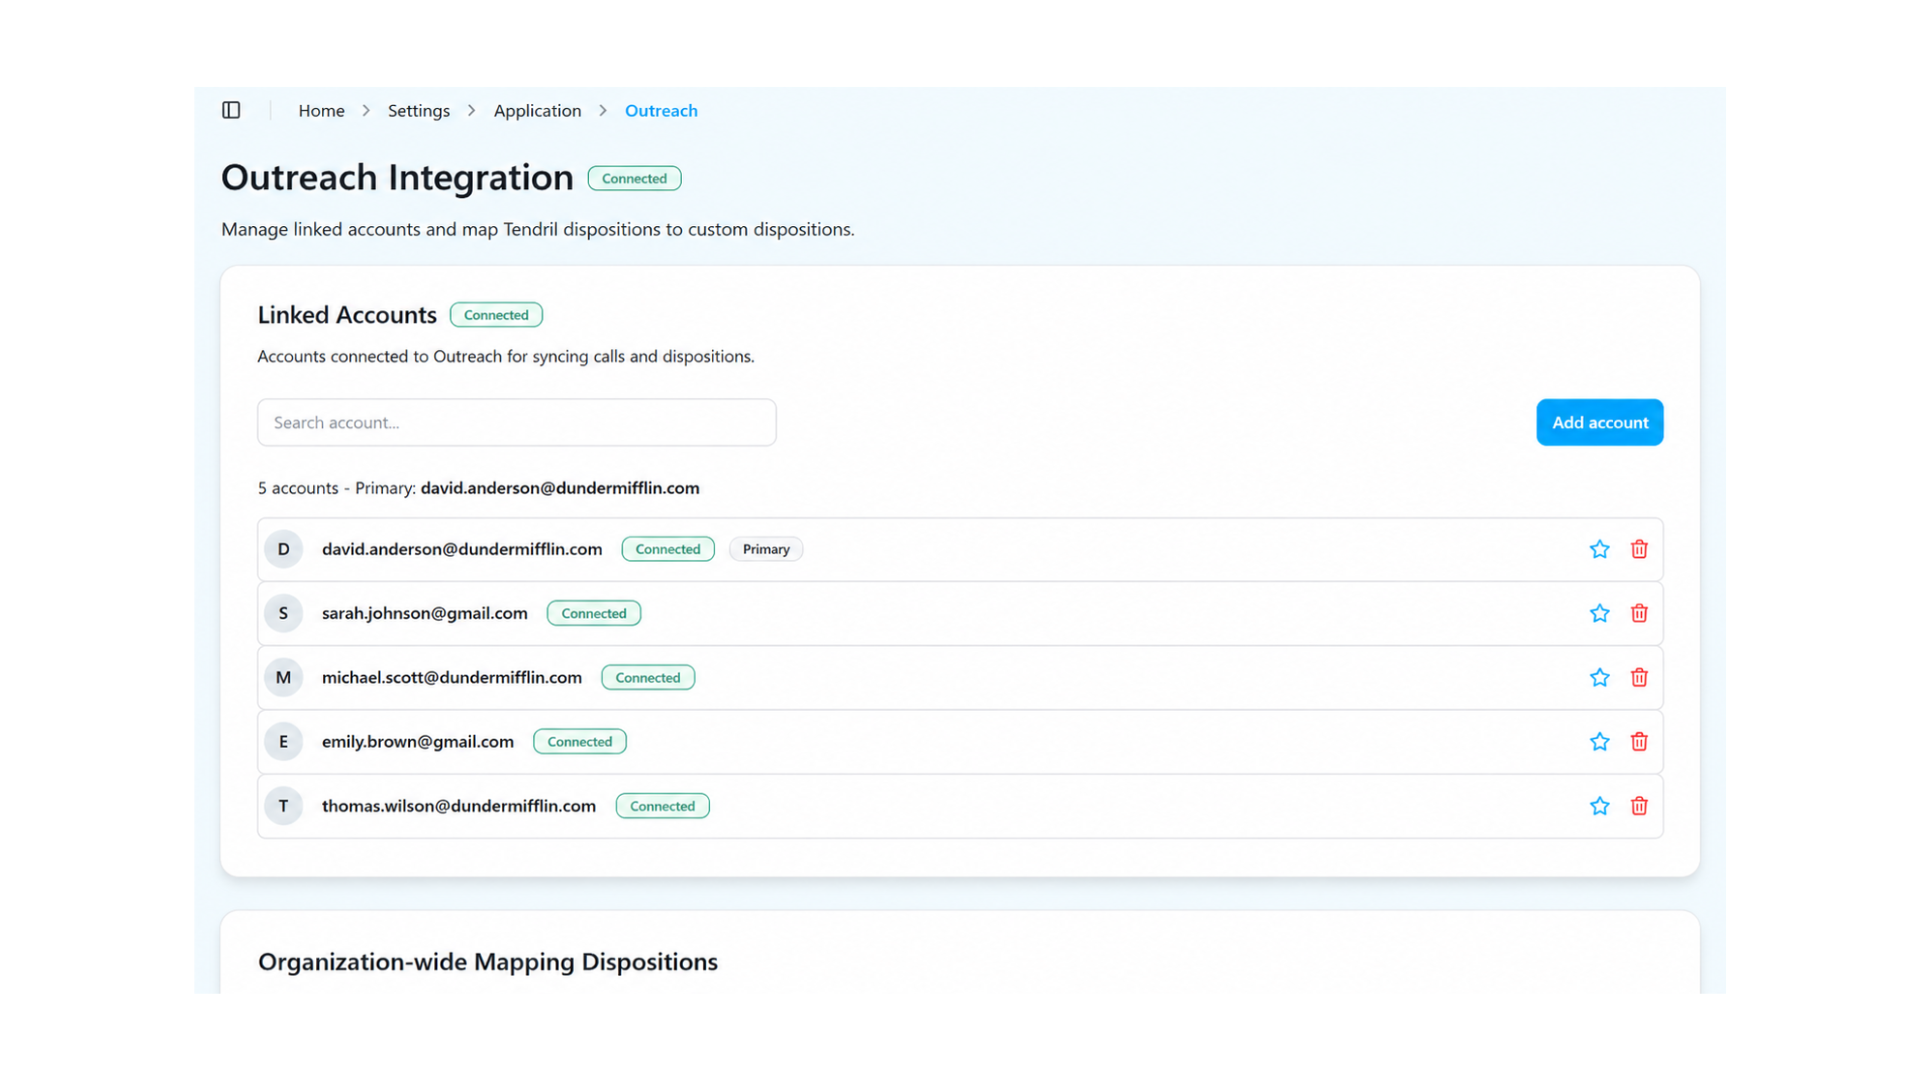
- Verify Outreach lists in Tendril- in the Contacts Panel, select the Outreach tab and choose a list to confirm the sync.
- Map your dispositions (optional) - create or edit custom call-disposition mappings; these sync back as a result of your calls.
If the connection section doesn't appear, go back to Tendril and do a hard refresh (Mac: ⌘ + ⇧ + R, Windows: Ctrl + ⇧ + R), then click the Outreach logo again.
Still stuck? Submit a ticket or browse the Help Desk.